That little tool you use to grab screenshots? It quietly turned into a full screen recorder, a voiceover studio, and a text-copying machine. Most people are still using maybe 10% of what it can do.
Here’s the thing. You probably press Win + Shift + S, drag a box, paste it somewhere, and move on. That’s the version of the Snipping Tool living in your head. It’s also about three years out of date.
The app sitting on your Windows 11 machine right now can record your screen as a video, capture system audio and your own microphone at the same time, let you narrate a tutorial as you go, pull text straight out of an image, and export the whole thing as an MP4 or a GIF. No downloads. No subscriptions. No watermarks. It’s already installed.
Let’s break down everything it actually does, with the exact steps you can follow today.
First, Make Sure You’re on the Right Version
Almost every feature in this post requires Windows 11. If you’re on Windows 10, the Snipping Tool still works for screenshots, but you won’t get screen recording, audio, or OCR. That’s just how Microsoft scoped it.
Beyond that, two version markers matter:
- Screen recording arrived with Windows 11 version 22H2 and later.
- Audio recording (system sound plus microphone voiceover) landed in Snipping Tool app version 11.2307.44.0 and higher, and full system audio support is most reliable on Windows 11 24H2.
To check and update: open the Microsoft Store, go to Library, and hit Get updates. If the Snipping Tool has a pending update, install it. This one step fixes 90% of the “I don’t see the audio button” complaints floating around forums.
The Screenshot Basics (Done Properly)
Even the screenshot side has more depth than most people use. Here’s the fast version.
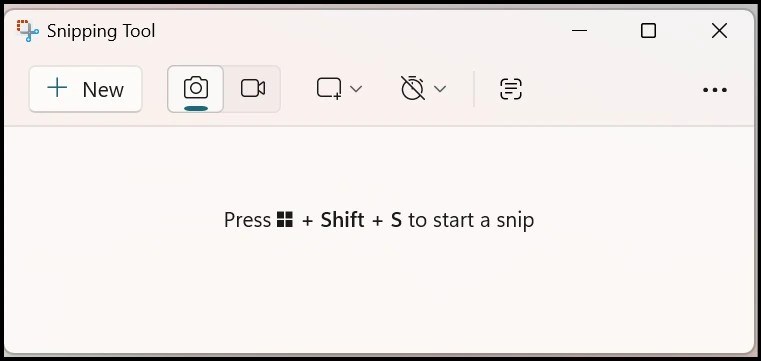
Press Win + Shift + S to open the capture bar from anywhere. You’ll see four modes across the top:
- Rectangular snip: drag a box around what you want
- Window snip: capture a single app window cleanly, no messy edges
- Full-screen snip: grab everything on the display
- Freeform snip: draw any shape you like around the subject
Once you capture, the shot lands in your clipboard and a small preview pops up in the corner. Click it to open the editor, where you can crop, annotate with a pen or highlighter, add shapes, and save.
One file-format tip worth knowing: in Settings, you can pick PNG, JPG, or GIF as your default. Use PNG for anything with text or UI elements because it keeps edges sharp. Use JPG when you care more about a small file size.
Screen Recording: The Feature Hiding in Plain Sight
This is the upgrade that genuinely replaces a chunk of what people used to install OBS Studio or third-party recorders for.
Here’s how to record your screen, step by step:
- Open the Snipping Tool (search for it in Start, or press Win + Shift + R to jump straight into record mode)
- Click the video camera icon in the toolbar to switch from screenshot to recording mode
- Click + New
- Drag to select the area of the screen you want to capture
- Click Start. A short countdown runs, then recording begins
- When you’re done, click the Stop button in the floating toolbar
Your recording opens right inside the Snipping Tool editor. From there you can save it as an MP4, or with recent updates, export it as a GIF, which is perfect for quick “here’s how this works” clips you want to drop into a chat or a doc.
According to Microsoft’s own guide, your finished video saves automatically to a “Screen Recordings” folder, so you’re not hunting around for it later.
Audio Is Where It Gets Interesting
This is the part almost nobody knows about, and it’s the reason you can ditch a separate recording app for most everyday tutorials.
The updated Snipping Tool can capture two audio sources at the same time:
- System audio: the actual sound coming out of your computer. The music in a video, the beep of an app, the audio from a call
- Microphone audio: your own voice, recorded as a voiceover while you demonstrate something on screen
That second one is the quiet game-changer. You can narrate a walkthrough live, explaining each click as you make it, and the Snipping Tool weaves your voice into the same MP4. No separate audio file to sync later. Microsoft literally pitches this as “perfect for quick demos.”
How to Turn On Audio While Recording
- Start a screen recording the way described above (camera icon, New, select your area)
- Once you’re in the recording setup, look at the top bar next to the timer and Start button
- You’ll see a microphone icon and a system audio (speaker) icon
- Click the microphone icon to capture your voice. The first time, Windows will ask you to allow microphone access. Say yes
- Click the speaker icon to capture system audio
- You can enable both at once, or toggle either one off mid-recording if you want a silent stretch
- Hit Start and narrate away
If you have more than one microphone connected, you can pick which device to use before you start. And you can set a default in the app’s Settings, so your mic either turns on automatically for every new recording or stays off by default. Making a narrated tutorial? Turn it on. Recording a silent screen capture for a bug report? Turn it off so it doesn’t pick up your room noise.
Quick troubleshooting: if the audio icons aren’t showing up, you’re almost certainly on an older version. Update the app via the Microsoft Store, and check that microphone access is allowed under Settings > Privacy & Security > Microphone.
One honest limitation: the Snipping Tool saves your voice and the video together in a single MP4. It doesn’t hand you a separate audio track. If you need to edit the narration on its own, you can pull it apart afterward in a free editor like Clipchamp, which also ships with Windows 11.
OCR: Copy Text Out of Anything on Your Screen
This one feels like a magic trick the first time you use it.
You know those moments where text is right there on screen but you can’t select it? A screenshot someone sent you. An error dialog. A PDF that blocks copying. A frame of a video. The Snipping Tool’s Text Actions feature uses OCR (optical character recognition) to lift that text straight off the pixels and into your clipboard.
There are two ways to do it.
Option 1: From a capture you just took
- Take a normal screenshot of whatever contains the text
- When it opens in the editor, click Text Actions
- The tool detects all the text in the image
- Click Copy all text, or select just the part you want
Option 2: The dedicated shortcut
- Press Win + Shift + T to launch Text Extractor directly
- Drag over the area containing the text
- Click Copy all text
- It’s instantly on your clipboard, ready to paste anywhere
It even handles text that’s normally locked away, like words inside images, video frames, and apps that block selection. It supports multiple languages too, though accuracy depends on how clean and high-contrast the text is rather than the language itself. Big, sharp, well-lit text gives near-perfect results. Tiny blurry text in a screenshot of a screenshot, less so.
Bonus: Text Actions can also automatically detect and redact sensitive info like email addresses and phone numbers before you share a screenshot. Genuinely useful if you’re posting screenshots publicly.
A Real-World Workflow That Ties It All Together
Say you want to make a two-minute tutorial showing a colleague how to use a feature in some web app. Here’s the whole thing using nothing but the Snipping Tool:
- Press Win + Shift + R to open record mode
- Select the browser window area
- Click the microphone icon on so you can narrate, and the speaker icon on so any app sounds get captured too
- Hit Start, walk through the steps out loud while you click
- Click Stop, trim off the dead air at the start and end in the built-in editor
- Save as MP4, or export a short GIF of just the key moment
- Need the on-screen text in writing too? Screenshot it, hit Text Actions, copy it into your written notes
Five years ago that workflow meant three different apps and a sync headache. Now it’s one tool you already own.
Where It Still Falls Short
It’s a genuinely capable free tool, but it’s not pretending to be a pro studio. Be realistic about the gaps:
- No scrolling capture. If you need to grab a long webpage that runs past the screen edge, you’ll need a third-party tool. The Snipping Tool can’t do it natively.
- No multi-track audio. Voice and system sound get baked into one track. Fine for tutorials, limiting if you want to mix later.
- Light editing only. You get basic trimming and annotation. For real video editing, cuts, transitions, captions, take your MP4 into Clipchamp or something heavier.
- Windows 11 only for the good stuff. Windows 10 users are stuck with screenshots.
For the vast majority of everyday captures, demos, and quick how-tos, none of that will bother you. You only feel the ceiling when you’re doing genuinely advanced production work.
The Bottom Line
The Snipping Tool stopped being a screenshot app a while ago. It’s now a capture, record, narrate, and text-extract hub that’s already sitting on your machine, free, with no account to create and no watermark stamped on your output.
The only thing standing between you and all of it is one update from the Microsoft Store and about ten minutes of trying the shortcuts. Press Win + Shift + S for a snip, Win + Shift + R to record, and Win + Shift + T to pull text off the screen. Commit those three to memory and you’ve unlocked the whole thing.
The best tool is usually the one you already have. You just have to find out what it can really do.
Sources
- Microsoft, How to use Windows Snipping Tool (official learning center)
- Eleven Forum, System audio and voiceover recording in Snipping Tool (version 11.2307.44.0)
- MakeUseOf, How to record audio while screen recording in Snipping Tool
- OneWebCare, Complete guide to screenshots, recording, and text extraction (2026)
- VibrantSnap, How to screen record on Windows 11 (audio and version requirements)
- Winaero, Snipping Tool built-in OCR and Win + Shift + R hotkey

Leave a comment